OAuth is becoming an increasingly important standard for authorizing limited access to applications and data. Unlike other standards, OAuth places the management of Web delegation into the hands of the actual resource owners, meaning that it is the user who connects accounts between different web applications, without direct involvement needed by the security administrators on each respective site.
To date, social media sites have been the largest early adopters of OAuth. Facebook and Twitter owe much of their success to the fact that they are not simply standalone Web sites but platforms that encourage integration with other applications. But OAuth is now increasingly being used by other sectors. Insurance companies, cable operators, and even healthcare providers are using OAuth to manage access to enterprise resources. Much of this adoption is driven by the corporate need to support increasingly diverse clients and mobile devices.
A useful feature of Mule Enterprise Security is the ability to act as OAuth client and OAuth Resource Server.
Mule acts as an OAuth 2.0 provider, demanding a valid OAuth access token from clients before allowing access. MuleSoft offers protection for your APIs and SOA endpoints, allowing only a single central entity to have access to your credentials. Moreover, OAuth has the capabilities to provide restricted or temporary access by controlling tokens which have an expiration date and limited scope.
The OAuth supports HTTP/S, Jetty, Servlet, and Web Service endpoints.
Common use cases include:
- Securing REST APIs.
- Mobile applications.
- B2B authentication.
Not only does integration become easier with the Mule ESB platform, Enterprise Security ensures safe connectivity between applications and services, allowing for secure seamless communication. Businesses can further utilize Mule Enterprise Security to maintain data integrity and confidentiality through encryption and prevent unwanted attacks.
Before we proceed, it is good to understand the OAuth concepts and terminology
OAuth defines four roles:
- Resource Owner
- Client
- Resource Server
- Authorization Server
We will detail each role in the following subsections.
Resource Owner:User
The resource owner is the user who authorizes an application to access their account. The application's access to the user's account is limited to the "scope" of the authorization granted (e.g. read or write access).
Resource / Authorization Server:API
The resource server hosts the protected user accounts, and the authorization server verifies the identity of the user then issues access tokens to the application.
From an application developer's point of view, a service's API fulfils both the resource and authorization server roles. We will refer to both of these roles combined, as the Service or API role.
Client: Application
The client is the application that wants to access the user's account. Before it may do so, it must be authorized by the user, and the authorization must be validated by the API.
Abstract Protocol Flow
Now that you have an idea of what the OAuth roles are, let's look at a diagram of how they generally interact with each other:
In the enterprise world, there may be a requirement to have authentications and authorizations between API services and its consumers. This may lead to having a standalone or embedded IAM server or solution. When we use Mule as the enterprise Integration platform, Mule can act as OAuth server to issue and validate tokens to the service consumers.
Let’s see how we can configure the OAuth server in Mule to issue access tokens and define a service (flow) where the access tokens that will sent to the flow requests and validated by Mule. The following steps will have to be performed to configure OAuth Server in Mule
- Define Mule as OAuth Server
- Define a flow(/getme) that will use the access tokens to authorize the consumers
- The flow will validate the access tokens via the OAuth Provider Module
Before we proceed, there are few pre-requisites:
Install Mule Enterprise Security
Requirements
- Anypoint Enterprise Security requires an Enterprise license. Contact
- Anypoint Enterprise Security requires Mule Enterprise version 3.3.2 or later
- If you’ve already downloaded Anypoint Enterprise Security version 1.1 onto your instance of Anypoint Studio, follow the procedure below to update to version 1.2.
Install Anypoint Enterprise Security for Anypoint Studio
- Launch Anypoint Studio.
- Under the Help menu, select Install New Software…
- Mule opens the Install wizard. Click the Add… button next to the Work with field.
- In the Add Repository panel, enter a Name for the repository, such as Anypoint Enterprise Security, and in the Location field, paste the following link: http://security-update-site-1.4.s3.amazonaws.com
- then click OK.
- In the table, check the box to select Premium, then click Next.
- Click Next in the next wizard pane.
- Use the radio button to accept the terms of the license agreement, then click Finish.
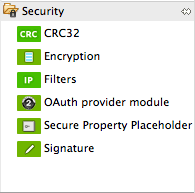
- Anypoint Studio installs Anypoint Enterprise Security version 1.2, then asks that you restart the application. Upon relaunch, Studio displays a new palette group called Security which contains six new message processors (see below).
Client Set-up
Now, we need to see how to create the “user” and “client” credentials which will be used in the subsequent steps
Configuring User Credentials
In the Anypoint Studio, create a new Mule Project .Open the mule configuration file and select “Configuration XML” tab.
In the mule xml file, configure resource owner’s credential details as shown,
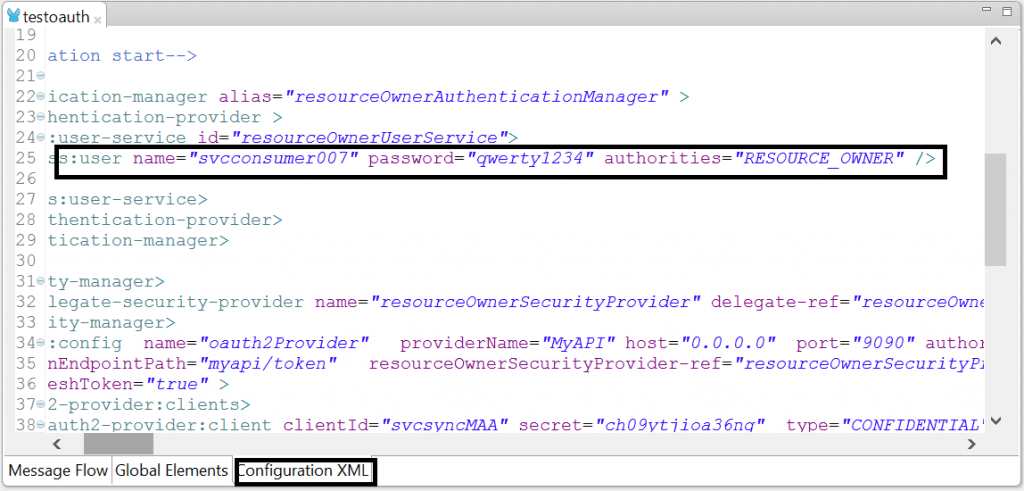
Since Mule is the OAuth server, the port and url to which the OAuth requests have to be sent must be configured in <config> element. In the example, the OAuth server uri is “myapi/token” and the port is 9090.
The attributes to be provided to the user are name, password and authorities as “RESOURCE_OWNER”.
Since Mule is the OAuth server, the port and url to which the OAuth requests have to be sent must be configured in <config> element. In the example, the OAuth server uri is “myapi/token” and the port is 9090.
How to configure client credentials
- To configure client credentials, open the mule configuration file.
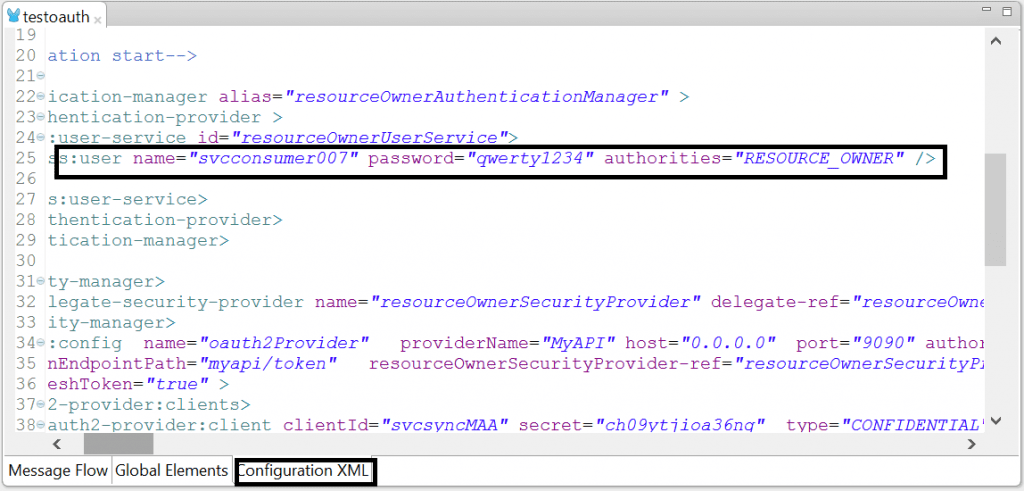
- For each API client or API consumer, there should be a <client> definition in the mule configuration
- Provide the value for the attributes clientId, secret, type, clientName, description for the <client>
- Provide the redirect-uri
- The grant types CLIENT_CREDENTIALS that enables client authorization and REFRESH_TOKEN that allows API clients to call the REFRESH_TOKEN to get the new accessToken
- The scope defines the actions that the clients are entitled for .cconsumers may then be limited to access certain scopes only. Define the scope as “ALL” that provides complete access to the requested resource. The other scope attributes are READ_RESOURCE, POST_RESOURCE . For a more detailed list, please refer the documentation.
Client configuration
Now, we need to define a flow in Anypoint Studio
- Drag and Drop an HTTP connector .Configure the URL (/getme) to listen on port 8081.
- Drag and Drop a logger component.
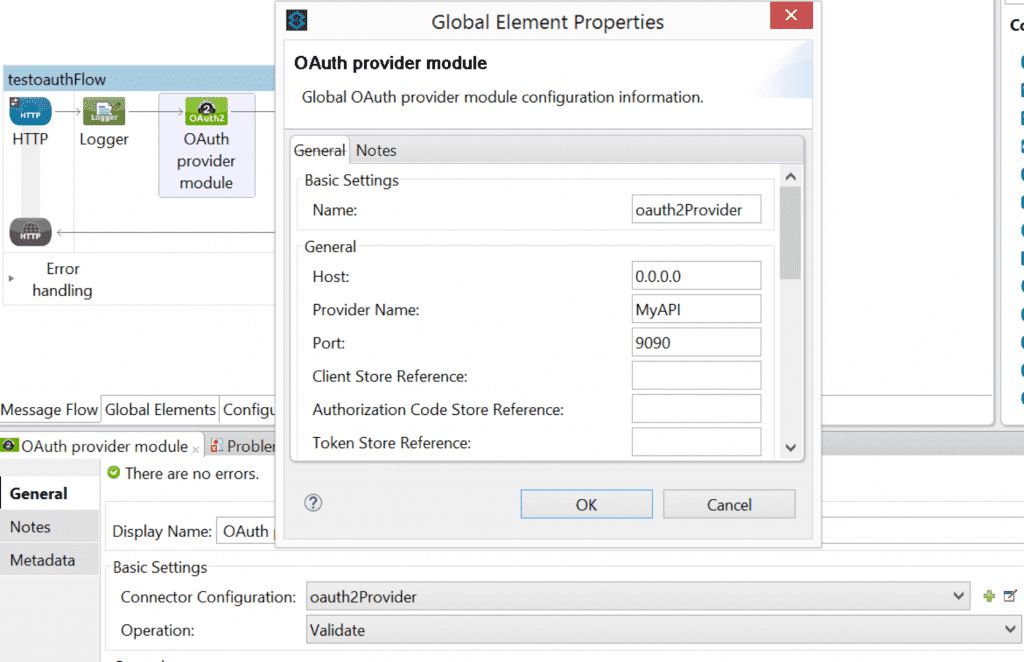
- Drag and Drop an OAUTH Provider Module component. The OAUTH provider module component will validate the access tokens that will be sent as a parameter in the request. To validate the access tokens, the oauth provider module has to be configured with OAuth server details to which the OAuth requests will be sent to.
- In the connector configuration click the + sign and provide the Host , provider name and Port of the OAuthServer.
- Click OK.
- Select “Validate” in the operation to validate the incoming OAuth access token.
Fetch Access Token
If the client needs to send a request to the flow -/getme , the client has to send the access token as query parameter.
To obtain the access token, the client has to send the URL in the following format
http://host:port/myapi/token?grant_type=authorization_code&client_id=<>&client_secret=<>
In the above URL, “client_id” and “client_secret” values should be as configured in the previous step. The URL in our case will be

The above request gives a JSON response that has the “access_token” to be used as query parameter in the client requests . The expiration time for the accesstoken is present in the attribute (in seconds).
Send REQUEST WITH Access Token
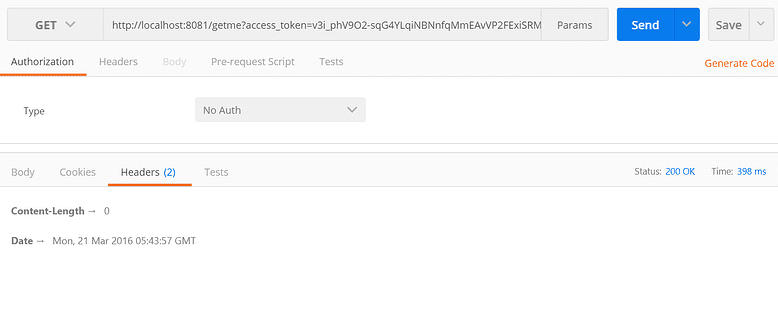
From the JSON response as obtained from the above step, get the “access_token” and send this value as a query parameter for all REST API calls. If I send a request with incorrect access token, I get HTTP 403 Forbidden request

Now let me send with the correct access token and I get a successful response, leaving us able to proceed to the next stage.
OAUTH Client Global Configuration
If we have more services or flows that requires OAuth based validation, then the best practice is to define the OAUTH server configuration as global element as shown below
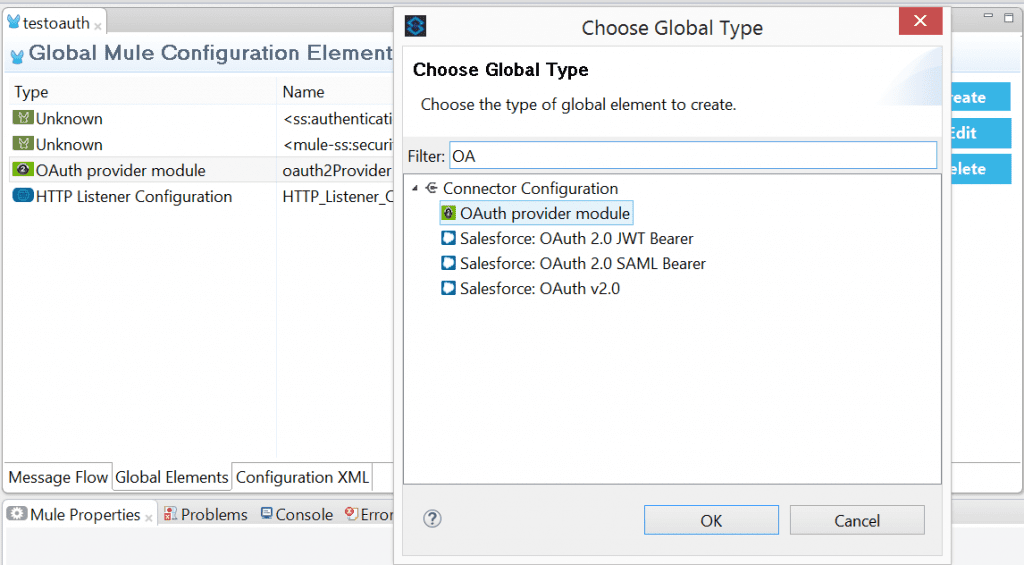
Click on “Global Elements” tab, click “Create”
In the Filter box Type OAuth, Select “OAuthProviderModule”, Click “OK”
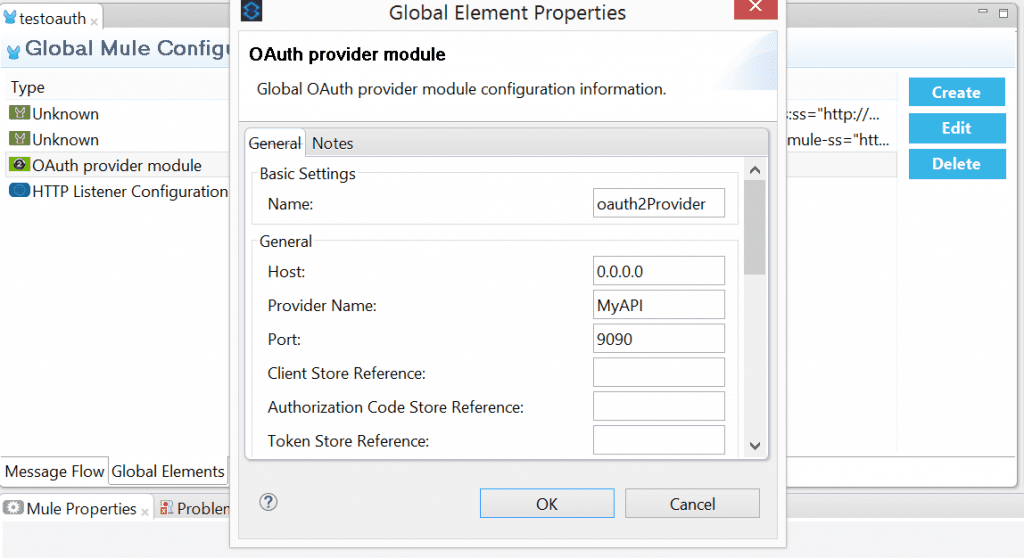
In the OAUTH Provider Module Properties, provide the OAUTH Server Host, port and provider name as shown below and click OK
In the flows where the access tokens have to be validated, drag and drop the OAUTH Provider Module component
In the OAUTH Provider Module component properties pane >connector Configuration, then select the global element configured.

Thus, we have briefly shown how to easily secure your APIs with OAuth 2.0, encapsulating such security logic in the form of configurable policies which can be applied with little effort to multiple APIs and eliminate the need for an additional OAuth Server or Identity Access Management(IAM) .
If you would like to find out more about how APIs could help you make the most out of your current infrastructure while enabling you to open your digital horizons, do give us a call at +44 (0)203 475 7980 or email us at Salesforce@coforge.com
Other useful links:
Related reads.
About Coforge.
We are a global digital services and solutions provider, who leverage emerging technologies and deep domain expertise to deliver real-world business impact for our clients. A focus on very select industries, a detailed understanding of the underlying processes of those industries, and partnerships with leading platforms provide us with a distinct perspective. We lead with our product engineering approach and leverage Cloud, Data, Integration, and Automation technologies to transform client businesses into intelligent, high-growth enterprises. Our proprietary platforms power critical business processes across our core verticals. We are located in 23 countries with 30 delivery centers across nine countries.


